Stand beside a closed exterior door on a windy January day and put your palm near the edges. The cold you feel is heated air leaving and outdoor air arriving, around all four sides of a door you think of as solid. Doors and windows are holes in the insulation you have already paid for, and sealing them is the cheapest heating upgrade that exists: no permit, no contractor, one afternoon.
Find the leaks first (15 minutes)
Seal everything and you will seal some edges that were fine while missing the one that matters. On a windy day, or with a fan blowing outward in a nearby window, move an incense stick slowly around each closed door and window frame. Where smoke wavers or streams, air moves. Mark each spot with painter's tape. The usual suspects: the latch side of exterior doors (the door shrinks away from its seal in cold), the bottom corners, and the meeting rail of double-hung windows.
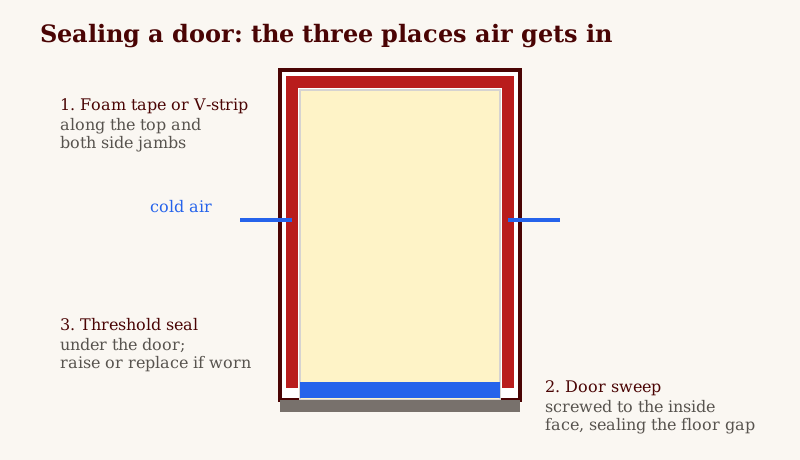
Doors: three edges, three products
Top and sides: foam tape or V-strip. Clean the jamb where the seal will sit; adhesive fails on dust. Wipe it down, then run a dry hand over it. If your palm comes away grey, go again. For V-strip, fold the strip into its V, nail or stick it into the jamb so the open side of the V faces the weather, positioned so the closing door presses it lightly. For foam tape, stick it to the door stop where the door face lands.
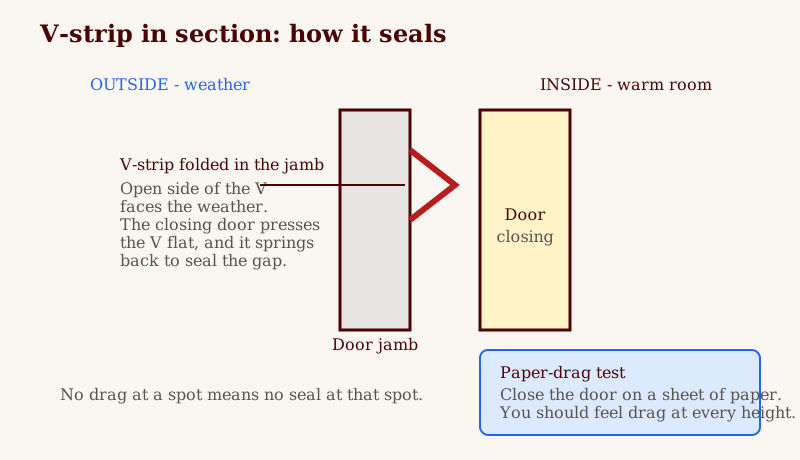
Either way the test is the same: close the door on a sheet of paper at several heights, then pull. You should feel steady drag everywhere, the paper resisting like it is being tugged from a book. What done feels like: the door closes with a soft, muffled thud instead of a wooden clack, the latch clicks without you leaning in, and the paper drags at the top corner and the bottom corner alike. Test at least four spots per side. A seal that drags in the middle and floats at the corners will still leak all winter at the corners.
Do this work with the door at its coldest if you can, on a cold morning or evening. Wood and vinyl both move with temperature, and a gap measured on a warm afternoon is not the gap you are sealing against in January.
Bottom: the sweep. Measure the door width, cut the sweep to length with a hacksaw, and screw it to the inside face of the door so the flexible fin just kisses the threshold with the door closed. You want contact without the door needing a shove. Check the feel as you close it: a slight increase in resistance over the last few centimetres is right. Resistance that builds early, or a fin that folds and scrapes, means the sweep hangs too low.
Underneath: the threshold. If daylight shows under the closed door even with a sweep, the threshold gasket itself is worn or the threshold sits low. Replacement thresholds and adjustable risers are hardware-store stock; raise or replace before blaming the sweep.
Advertisement
Windows: match the fix to the window
- Double-hung windows leak at the meeting rail and the sash sides. V-strip in the sash channels and a foam or rope seal at the meeting rail handle most of it.
- Casement windows usually need their factory gasket replaced; pull a sample of the old gasket to match the profile.
- Any window, worst case: rope caulk pressed into the gaps for the season, or interior shrink film over the whole frame for the winter. Both read as temporary because they are, and both work embarrassingly well per dollar.
When the fix fights back
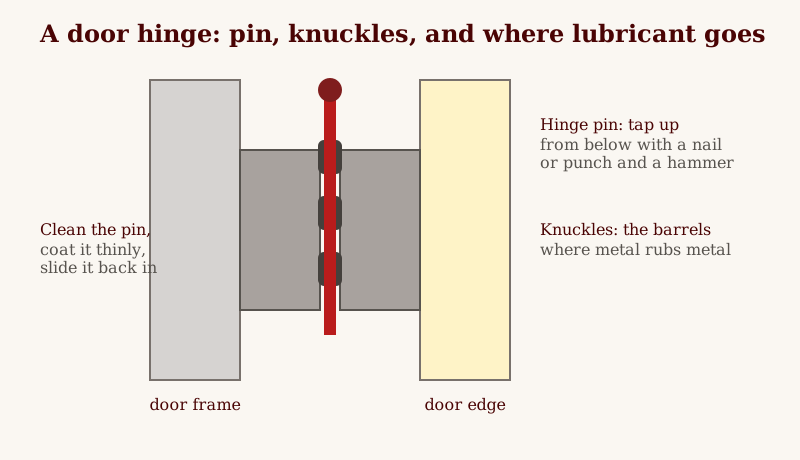
The door is now hard to close. This is the seal telling you it is too proud. Find the bind point by closing the door slowly and watching where the door face meets the seal first. Chalk or a strip of painter's tape on the seal shows you the contact patch. Three fixes in order: seat the seal deeper in the jamb, step down one profile thickness, or check the hinges. A door that has sagged a few millimetres presses one corner hard and floats the opposite one, and no seal thickness fixes a crooked door. Tighten hinge screws first (the top hinge takes the load), then reseal.
The seal peels off. Adhesive gives up for one of three reasons: the surface was dusty, the surface was cold, or foam tape got stretched during install and has been pulling back ever since. Peel the failed run off, clean the jamb with a cloth barely damp with rubbing alcohol, and let it flash dry. Warm the jamb with your palm on a cold day, press the new run on without stretching it, and hold pressure for a full thirty seconds per section. For V-strip in a high-traffic doorway, use the nailed version. Nails do not care about temperature or dust the way glue does.
The bottom corners still leak. Corners are where straight products meet and quit. Cut your runs a touch long and overlap the corner, or add a small corner pad (most kits include them, and most people throw them away). The candle test at the bottom corners after the main runs go in will tell you if you need them.
Common mistakes
- Sealing before finding the leak. An hour of sealing the wrong edges leaves the actual draft untouched and the worker convinced the product failed. Fifteen minutes with incense first, then seal what the smoke named.
- Stretching foam tape as it goes on. Stretched tape thins out and shrinks back over the following weeks, opening end gaps. Lay it on relaxed, press it down, and cut it a few millimetres long so the ends butt tight.
- One product everywhere. The jamb, the bottom, and the threshold are three different gaps with three different movements. A sweep forced to do a jamb's job scrapes; jamb foam at the bottom gets kicked apart in a month.
- Skipping the cold check. Re-run the paper test on the first cold night. Seals settle, doors shift, and one floating corner caught in October is a five-minute fix instead of a January complaint.
Cost and order of operations
A door takes CAD $15 to $30 in materials and under an hour once you have done one. Do the worst door first (usually the one opening to the garage or the north wind), live with it a week, and you will know your technique before doing the rest. And fix any squeaky, sagging door first: a door hanging crooked cannot seal evenly no matter what you stick to it, and the hinge work takes ten minutes.
This is the natural partner to the furnace filter schedule: one keeps the heat in, the other moves it efficiently. Do both on the same fall weekend as the gutters and the house is ready for winter in the ways that actually matter.