The thermostat is the one piece of home wiring a beginner can approach with confidence, because it is not house wiring at all. The cables behind it carry 24 volts from a transformer in the furnace, enough to signal, not enough to hurt you. The job fails on paperwork, not electricity: wires moved without labels, a new unit bought before anyone checked for a C-wire, heat type set wrong in the menu. Forty careful minutes and all three are handled.
Before you buy: check your wires
Pop the old thermostat off its wall plate (most pull straight off) and look at the terminals underneath.
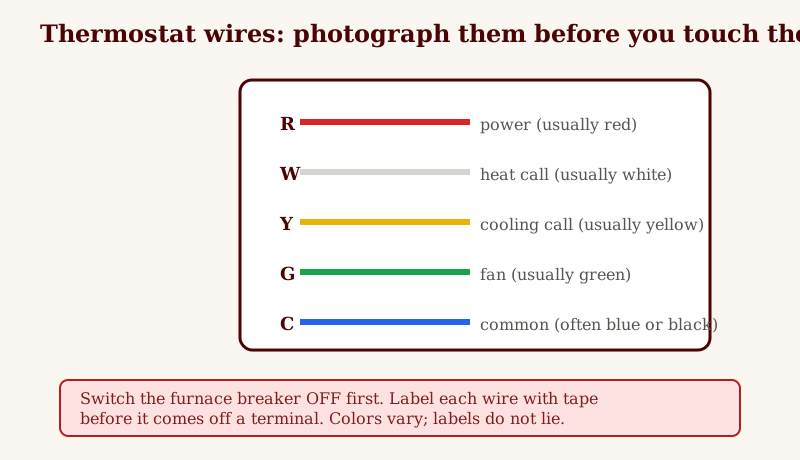
- Letters R, W, Y, G present: standard forced-air system. Nearly any new thermostat works.
- No C terminal and no spare wire: read the C-wire FAQ before choosing a smart model.
- Thick wires with wire nuts, or terminals marked L1/L2: that is line voltage for electric heat. This guide does not apply; see the FAQ.
- A heat pump: note whether there are O/B and AUX/E wires. Heat pumps wire and configure differently (the thermostat must be set to heat-pump mode), and getting it wrong runs the auxiliary heat, the most expensive heat in the house, in silence.
Photograph the plate with every wire on its terminal. Then label each wire with masking tape marked with its terminal letter.
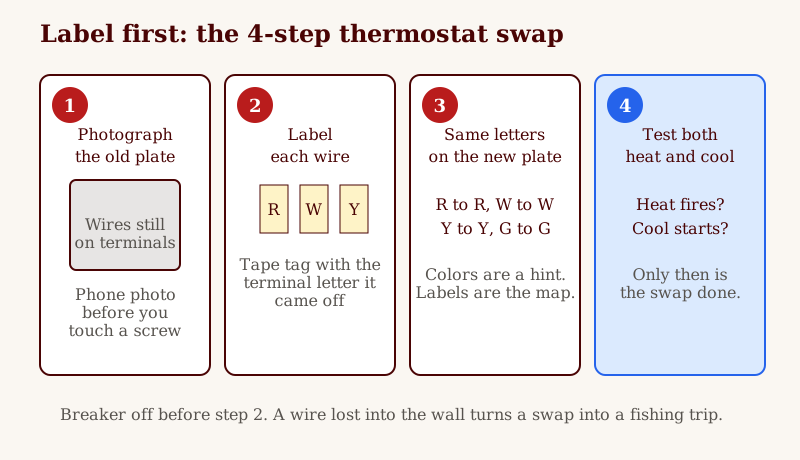
The labels want a light touch. Wrap the tape tag tight enough that it survives the wire sliding through the wall hole, loose enough that you can still read your own letter. Use a fine marker; a fat one turns W into a blob by step three. Label before you loosen a single screw. The moment a bare wire comes off its terminal it wants to spring back into the wall, and a labelled wire that escapes still tells you where it belongs when you fish it out.
Advertisement
The swap
- Switch the furnace breaker OFF at the panel. Confirm the old thermostat screen is dead.
- Labels on every wire, then remove them from their terminals one at a time. Bend each bare end so it cannot slip back into the wall. Losing a wire into the wall cavity converts this into a fishing expedition; a pencil wrapped with the bundle prevents it.
- Unscrew the old plate, thread the wires through the new plate, and mount it level. Most smart thermostats include a trim plate that covers the old footprint and its paint line.
- Connect each labelled wire to the same letter on the new plate. R (sometimes split into Rc and Rh with a jumper on single-transformer systems; follow the new manual's jumper note), W to W, Y to Y, G to G, C to C if you have one.
- Push the excess wire gently back into the wall so it does not pinch, mount the thermostat, breaker on.
When the new unit misbehaves
Do the testing before the tools go away, and give each test time. A furnace takes a minute or two to run its start sequence, and a thermostat that looks dead at thirty seconds often wakes up on its own at ninety.
No power, blank screen. Work the short list in order: breaker on, furnace service switch on, blower door fully seated on its safety switch, C wire tight at the thermostat and actually landed on C at the furnace board. If the screen stays dark after that, pull the thermostat and check for a blown board fuse, covered in the FAQ. Battery-powered models take this whole list off the table, which is one reason they suit first-time swaps.
Heat and cool feel swapped. The house calls for cooling and warm air arrives, or heat runs the outdoor unit in cooling mode. On heat pump systems this is the classic O/B setting: the reversing valve energizes in the opposite mode from the one you selected. Change the O/B setting in the installer menu (energize on cool versus energize on heat) and retest. On conventional systems with no heat pump, swapped heat and cool points to Y and W trading places, which is a labels question, so go back to your photo before you touch the menu.
Auxiliary heat runs constantly. The AUX or EM HEAT indicator stays on through mild weather, or the heat pump runs alongside its backup strips for hours. First suspect: the thermostat is still set to conventional (furnace) mode on a heat pump system, so it treats the backup heat as the main heat. Set the system type to heat pump with auxiliary heat, confirm the balance point setting if the model offers one, and retest on a mild call for heat. If aux heat still stages up within minutes on a mild day, the O/B configuration is the next check, then the wiring at AUX/E.
What good looks like after a swap: the room temperature on the new unit matches a cheap thermometer held beside it within a degree, heat and cool both answer a test call, the fan runs on its own when set to ON, and the system shuts off cleanly at the setpoint without overshooting room after room.
Common mistakes
- Trusting wire colors over terminal letters. Colors are what the installer had on the truck. Letters are what the system actually did for years. Your tape labels, taken from the old terminals, are the record that counts.
- Removing wires before labelling. An unlabelled bundle of five similar wires is a guessing game with a furnace at the end of it. Labels first, screws second, every time.
- Letting wires slip into the wall. Bend each freed wire so it hooks on the wall hole, or wrap the bundle around a pencil. Fishing a dropped wire out of a wall cavity takes longer than the whole rest of the job.
- Skipping the system-type menu. The swap is not done when the screen lights up. Fuel type, heat pump versus conventional, and single-stage versus multi-stage settings shape every call the thermostat makes. Two minutes in the installer menu prevents a winter of strange behaviour.
- Testing only one mode. Heat working tells you nothing about cooling. Call for both, in season or by briefly lowering and raising the setpoint, and listen for the outdoor unit on the cooling call. Both modes verified is what done means here.
Setup is part of the job
In the new unit's installer menu, set the system type to match what you have: furnace type (gas, electric, boiler), heat pump or conventional, and stages if asked. A thermostat that thinks your furnace is a heat pump will orchestrate expensive mistakes politely and on schedule. Then program the schedule you will actually live with, including a night setback you can sleep through; an ambitious schedule abandoned in a week saves nothing.
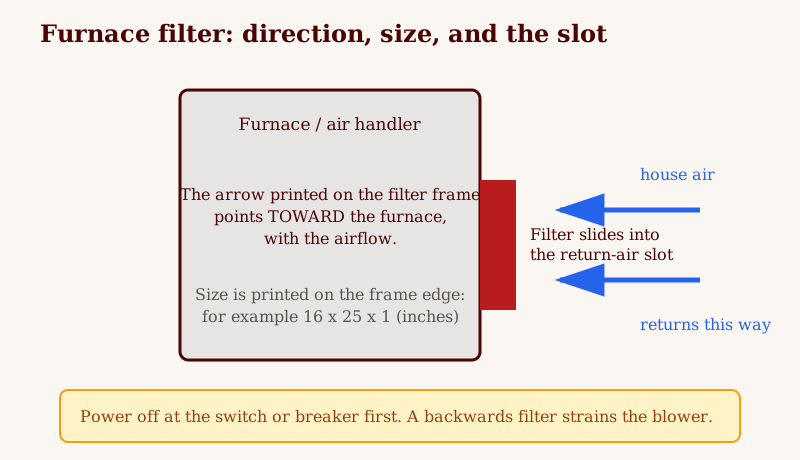
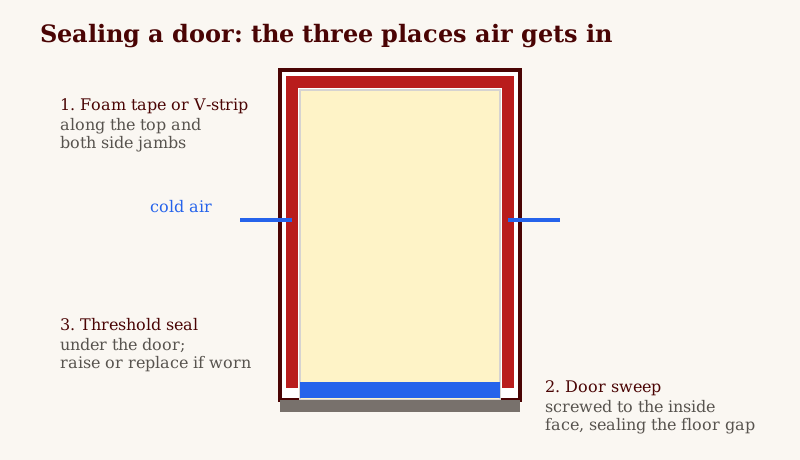
Test both modes before you call it done: call for heat and confirm warm air and the furnace firing; call for cooling (in season) and confirm the outdoor unit starts. Then check the two maintenance partners this pillar pairs it with: a clean filter on the right schedule (furnace filter guide) and sealed doors (weatherstripping guide). The thermostat decides when to run; those two decide how much good the running does.